Not Your Average Veggie Burger

Does anyone actually like Boca Burgers? Is it possible? Their ingredient list is as follows: WATER, SOY PROTEIN CONCENTRATE, WHEAT GLUTEN, CONTAINS LESS THAN 2% OF METHYLCELLULOSE, SALT, CARAMEL COLOR, DRIED ONIONS, YEAST EXTRACT, SESAME OIL, HYDROLYZED WHEAT PROTEIN, NATURAL AND ARTIFICIAL FLAVOR (NON-MEAT), DISODIUM GUANYLATE, DISODIUM INOSINATE. CONTAINS: SOY, WHEAT, SESAME.

I feel nauseous. And let’s be honest here, most veggie burgers you eat at restaurants aren’t much better. Black bean burger anyone? Some ketchup for your soy? Isn’t a veggie burger supposed to have, you know, vegetables?

I’m here to tell you that yes it can! And it can taste great! And be a complete source of protein, fiber, carbs, vitamins and minerals! What more can you ask for?? Given the lack of leftovers at lunch this week, not too much, it seems.

DSC_0133

On the menu this week: Mushroom burgers (I’d made them after visiting Dave in Bridgehampton), roasted garlic scape pesto, quick pickled carrots & radishes, and crispy scallions. I made all the fixings (and a salad, dressing, and a side of sautéed snap peas) in under an hour. So read on, don’t be afraid! You, too, can learn the art of the veggie burger! Here’s the recipe I provided to our CSA this week, followed by some additional notes and suggestions:

CSA 626

For the veggie burgers, you’re looking for something with a great flavor, that holds together when cooked, and has some texture. To achieve this delicate balance, you need a few things:
Vegetables: Alliums (onions, scallions, shallots, leeks, garlic, etc) are a must, as they bring out the savory flavor in foods. Other go to veggies that have a savory, earthy flavor include mushrooms, eggplant, and squash.
Legumes: Add a nice texture and starchiness, and of course are a great source of protein and other nutrients. I like to use chickpeas or lentils, which are a bit more flavor neutral than cannellini or black beans.
Grains: These are important to hold the burger together. You can use almost anything you’d like, knowing that you’ll need to put it in the food processor to make it work. Bread crumbs are a great way to hold everything together, as you’ll inevitably find your “dough” is too sticky. I’ve recently turned to psyllium husk, which is a great high-fiber, gluten-free ingredient that works as an amazing binder.
Nuts/Seeds: These add crucial fats and great texture to the burger. Stick to more unassertive flavors like sunflower seeds, cashews or pine nuts.
Herbs/Spices: Use them! They add so much flavor and wonderful nutrients to your burgers. You should be able to eat your dough with a spoon and thoroughly enjoy it. Parsley goes with everything. Do not forget salt and pepper. And go for a little lemon juice if things seems dull.

To achieve the perfect texture that holds together, here’s my trick. Cook all your vegetables. Cook your legume. Cook your grain. Mix it all together. Take between 2/3 and 3/4 of that mix, and put it into your food processor or blender. Process until just a few chunks remain. Mix that back in with the whole veggies, legumes and grains. Then add in any herbs, spices, or fresh vegetables. And finally add in bread crumbs or psyllium to get the right moisture for patty-making.

Veggie burgers can be cooked in the oven, pan-fried, or on the grill. I’ve never had a problem getting a nice crust on my burgers in the oven – I just make sure the pan is hot before putting the burgers on it (just put it in the oven while its preheating with a bit of oil).

And don’t think mushrooms and rice is all there is! This is the perfect recipe to get creative with. Here are just a few of my flavor suggestions:
Quinoa + Red Bean + Walnut + Ginger/Parsley/Scallion
Butternut Squash + Black Bean + Chestnuts + Spinach
Spinach + Chickpeas + Cumin
Lentils + Kale + Sweet Potato + Garam Masala/Curry Powder/Cilantro
Corn + Polenta + Sun Dried Tomatoes + Goat Cheese
Eggplant + Rice + Tomato + Cilantro/Curry Powder/Garam Masala
Black Beans + Rice + Allspice + Nutmeg + Jalapeno

What can I say…I’ve done a lot of experimenting…And I hope you will too!

Springing into Summer

Seasons aren’t quite as distinct as most people would like to think. The summer solstice, longest day of the year and first official day of summer, was just two days ago, but I’ve felt the heat of summer throughout the past month. And then some April showers will periodically pop back in, hesitant to turn into a real summer thunderstorm.

And some of the plants seem a bit confused as well, but of course they’re doing their best to be beautiful and provide delicious sustenance. And their best is pretty freakin’ spectacular, so I was fortunate to provide this meal for the farm crew last week:

DSC_0138

Salad from the thinnings of our next lettuce planting, nasturtium flowers, and borage flowers. I also tucked a bit of purslane and sweet clover in there, gotta get in my wild edibles.

DSC_0146

And the super crunchy, protein dense, bursting with herbs Springing-Into-Summer Salad to satisfy the physical needs and delight the culinary senses of a farmer. Peas provide a wonderful, sweet crunch, and are full of anti-oxidant, anti-inflammatory action, as well as Vitamins A, B1, C and K. Baby carrots (and their tops!) add a more delicate sweetness and heartier crunch, and are a fantastic source of anti-oxidants, especially Vitamin A. Fennel adds nice texture, and a wonderful aromatic, licorice-like taste, and more phytonutrients. The succulent, bitter leaves of radicchio provides half your daily dose of vitamin K. And the herbs – oh the herbs – pack some pretty powerful flavors and nutrients of their own. Detailed chart to come. Until then, just trust…

DSC_0147

Springing-Into-Summer Salad
2 c. cooked black beans
2 c. sugar snap peas
1 bunch baby carrots
1 fennel bulb
1 head radicchio
2 scallions
1 huge bunch parsley
1 bunch mint
1 bunch lemon balm


I’m sure you’ve already got your black beans soaked and cooked, so let those cool.
Make your dressing by simply blending up 3 garlic scapes (or 1 clove), juice of 2 lemons, salt, pepper, a touch of honey and olive oil (3-4x the amount of lemon). Add some water if needed.
The peas are fine as they are, tops off of course. Chop the carrots into bite-sized pieces, and finely dice their tops. Slice the fennel into thin strips, and add everything into a large bowl. Pour a bit of dressing over the veggies, and toss to combine (and prevent fennel from browning). Let sit for 20 minutes to marinate, if possible.
Chop the scallions, radicchio, and herbs, and add to the salad. Season with salt and pepper, if needed, and serve!

I served cous cous and some rice on the side, though I’ve been a legume-girl at lunch lately (thanks to granola at breakfast), and also some fresh peas, carrots and radicchio leaves. Someone suggested eating the bean salad in the radicchio leaves – farmers are brilliant. This salad is pretty flexible, and would love to see some radishes, squash, maybe some sprouts or seeds, whatever you’ve got around that’s inspiring you at the moment.

DSC_0155
And if my mother is reading…those are Farmer Lev’s good ‘n’ soiled hands…not mine! Signs of a hard workin’ man.

Scads of Scapes

DSC_0103

Another lovely weekend on the farm, another peaceful, productive day of preserving. This week’s episode: garlic scapes. Have you heard of ’em? Or seen ’em? They’re eccentric little buggers..that’s for sure. Twisting and looping amongst the tall, straight leaves, bursting with energy, wanting to push out a flower. Alas, our CSA is expecting juicy bulbs, not delicate flowers, so they’re all coming off.

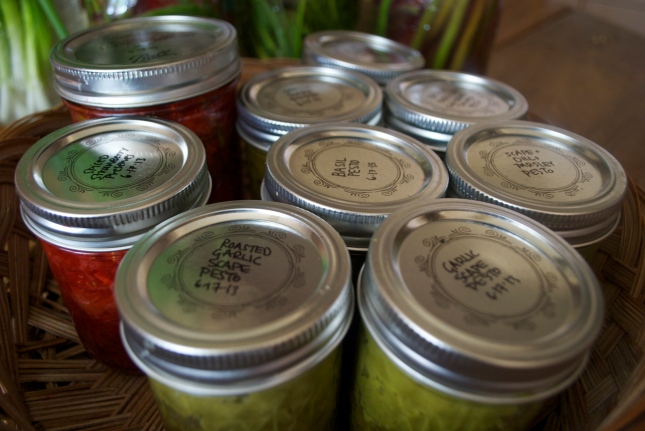
Some might be intimidated by thousands of garlic scapes, but I just see possibilities. Scapes are full of vitamin C, boost your immune system, and help promote a healthy heart. So I set about preserving these nutritional benefits, and the tender, mild garlic taste in the best ways I know how: pesto and pickles.

DSC_0124

You can see from the photo that I preserved a bit more than just garlic scapes…strawberries and basil are also in full gear right now, and I couldn’t resist a few batches of strawberry basil jam and plain old basil pesto. For now, I’ve got a highly flexible recipe for garlic pesto to share:

Garlic Scape Pesto

10-15 garlic scapes
1/3 cup toasted sunflower seeds
pinch of salt
1/2 lemon
1 T nutritional yeast
Olive oil

Place the scapes and seeds in your blender or food processor, and pulse away. Add olive oil until it reaches your desired consistency. I found that scape pesto tends to be a bit chunkier than basil pesto, no matter how much oil you add…I was generally not adding more than 1, maybe 2 tablespoons. Some recipes might call for a half cup of oil, that just seems excessive to me, but maybe you’ll be into it. Try it out.
Once you’ve got the consistency down, add in some salt, lemon juice and some nutritional yeast for a nutty, cheesy flavor.
Enjoy on toast, pasta and bean dishes, in soups, or as a dip.

For some variations…
Nuts/Seeds: pine nuts, almonds, walnuts, sesame seeds, pumpkin seeds; raw, toasted, sprouted
Oils: sunflower, safflower, nut, avocado, flax, sesame
Additional herbs/greens: dill, parsley, cilantro, basil, kale, arugula, spinach

For a wonderfully subtle, sweet garlic flavor, try roasting or grilling your garlic scapes and then blending them into pesto. Oh man, I could’ve just eaten that stuff with a spoon. But! I froze it for future times when we’re scapeless and scrounging.

And of course, no preservation day is complete without some fermentation. Full post on this still in the works, but I am nowhere near the expertise level of Sally Fallon or Sandor Katz, so give me a few more cycles of experimentation…

DSC_0126

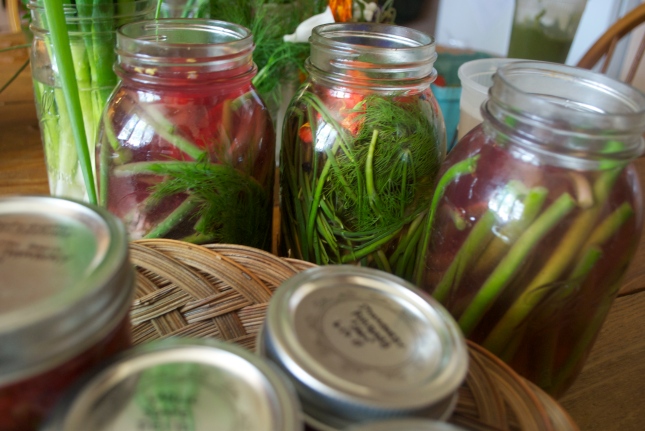
These three jars took me all of ten minutes to put together. I mixed up 3 quarts of dechlorinated water, 3/4 cup brine from a previous ferment, and 3 T sea salt. I packed each jar with some combination of scapes, dill, hot peppers, and peppercorns, and then poured the brine to cover the scapes.
The jars are now hanging out on my counter, where I’ll periodically check to make sure they’re submerged in the brine, and in a week (though I’ll probably wait at least two) I’ll be tasting them until they’ve reached lacto-fermented perfection. Er, close to it.

Not much better than a crunchy, tangy, spicy pickle on a hot day…

A Trio of Kale Salads

Our CSA has been featuring quite a few green things, with kale being a superstar (in my opinion). Full shares received a whopping pound of this amazing superfood, and I felt obliged to share a few recipes with them upon hearing how many people were not into the “bitter taste.”

IMG_0347

Kale, in general, has a deep, earthy flavor, but the flavor, texture, and look ranges over all the different varieties. For example, Toscano/Lacinato/Dinosaur kale tends to be sweeter and more delicate when compared to Curly/Winterbor kale, which has a lively, pungent flavor. Ornamental varieties like Red Russian or Rainbow Lacinata have their own unique properties as well. And they’ve each got dishes that they work best in, too. Toscano, with its long, narrow leaves, is great in salads. Curly kale makes the best chips. The possibilities are endless. Just ask me.

I’m sure you’ve probably heard other people ranting and raving about kale, and if you still haven’t jumped on the bandwagon, let me give you a quick run down of the nutritional reasons to try this amazing vegetable out:
-Great source of antioxidants like vitamin C, beta-carotene, manganese and flavonoids
-Significant amount of fiber and omega-3 fatty acids
-Rich source of glucosinolates, which the body converts into cancer preventive compounds
-Twice the vitamin K of other cruciferous vegetables
-A delicious way to get some copper, calcium, vitamin B6 and potassium

There’s a lot of debate about raw versus cooked kale (and other vegetables), and for me, it just comes down to balance. Are you having a smoothie or salad? Go raw. Are you looking for a hearty, warming meal? Add some steamed kale. Are you craving a salty snack? Eat some kale chips! Mix it up, and listen to what your body needs. Here were the two recipes I provided to our CSA:

Kale Recipe - Wk 2

And here’s a third “recipe” as an example of how to turn this green leafy vegetable into your main dish:

DSC_0024

Curried Kale, Squash and Lentils

Squash – butternut, banana, or sweet potatoes – they are naturally sweet and easy to cut
Lentils – green or brown hold up better than red
Kale – any variety, but a flatter leaf is easier to work with
Spices – curry powder, cinnamon, cumin, turmeric, paprika, cayenne

**I’m not giving any quantities because believe it or not, you can decide!! Do you want this to be a side? Go with more kale, fewer lentils. Do you love Indian flavors? Pile on the curry powder. Find your desired flavor profile, and go with it.

Peel your squash, scoop out the pulp, and cut into 1-in cubes.
Drizzle coconut (or sunflower or olive) oil, and a little salt and pepper on the squash. (you can also add spices to get more depth of flavor in your dish)
Roast squash in 400 degree oven until soft & starting to brown, checking on it every 15 min and turning it as needed. Takes 30-40 minutes depending on size of chunks.

In a 2:1 ratio, combine water and lentils. Bring to a rapid simmer, then turn heat down to low and cook until lentils are tender, about 15-20 min. Feel free to add some spices to your lentils, but save the salt until final flavoring.

Meanwhile, chop up a huge handful of kale. Leaves, stems, everything. Add it into the lentils in the last few minutes of cooking to soften the leaves. You can add the stem parts before the leaves if you aren’t into the crunch.
Drain the water, add a touch of salt, pepper, juice of half a lemon and stir.

Combine the squash, lentils, and kale for a delicious, warm meal, and eat the leftovers cold!

This dish tastes great with chopped prunes or dates, golden raisins, slivered/toasted almonds, and even a little blue cheese.

Any stew, grain/bean or noodle dish you love to make would probably benefit from a little kale. Start out small and work your way up to a full kale salad or smoothie…but the more you try it, the more you’ll start to appreciate it’s taste and powerful source of nutrition (this is coming from a kale/green vegetable hater). And the more you’ll find how versatile it really is!

Nothing To Get Hung About…

DSC_0059

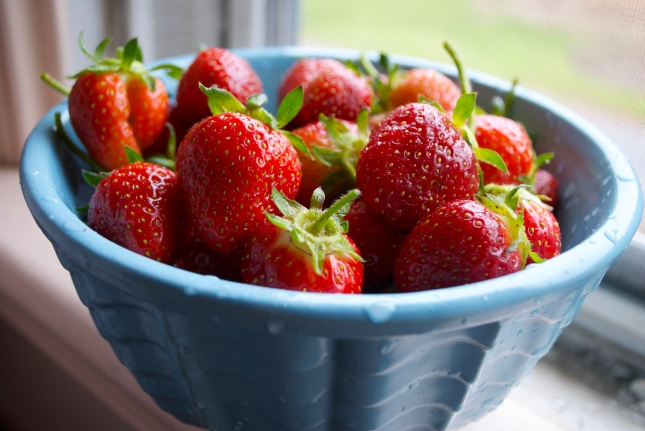
It’s strawberry season!!! These lovely ladies started flowering a few weeks ago, and their fruit has arrived at last. There’s not much better than popping a few fresh strawberries before, during, after work and basically any time of the day. I think at least half of them end up in my belly instead of my basket during harvest time. Oh well, they’re a fantastic source of antioxidant boosting Vitamin C (more than any other fruit) and manganese, and they’ve got plenty of phytonutrients, potassium, magnesium and omega-3 fatty acids. They’re great for the heart and helping to regulate blood sugar.

These highly perishable fruits (not berries, but who really cares about these silly labels) should be eaten as soon as possible upon harvest! Within 2 days of being picked, their Vitamin C and phytonutrient content is greatly diminished, no matter how well you try and store them. Find a farm near you and get pickin’! I guarantee it’ll taste better than any Driscoll strawberry you find in a grocery store.

They’re great on their own, in a salad, in a dressing, or served atop your favorite breakfast.

DSC_0065

Three-Grain Porridge
1 cup quinoa
1 cup millet
1/2 cup amaranth

Soak your grains overnight.
In the morning, pour the grains & water into a pan, bring it to a boil and then simmer for 20-30 minutes until you reach your desired consistency. I start adding almond/coconut milk after the water is absorbed about 15 minutes in.
Mix in a dab of coconut oil, a pinch of salt and top with strawberries, or anything else that you fancy!

Oh! And stop throwing away those strawberry stems and leaves! You can eat them with the rest of the fruit if you’re fine with the texture, or save them to make strawberry leaf tea. It’s full of trace minerals like vitamin C, calcium, and iron. And it’s often used to improve digestion and balance the alkalinity of your digestive tract.

You can even use the juices of strawberries applied externally to protect your skin, hair and nails – anthocyanins keep the structure of collagen in tact, and copper keeps your hair healthy and growing. And you’ll smell so fresh and sweet, what’s to lose?

Mama Always Told Me…

Mama Always Told Me...

“Don’t waste your food, Megan! Do you know how many starving children there are around the world?”

Well, I guess the acorn doesn’t fall far from the tree on this one. My farm manager told me she was about to go mow in the backfields, where we’d been collecting rogue green onions for a few weeks. There were at least a hundred plants back there, and that just wasn’t going to sit right with me. Scallions are a fantastic source of flavonoids and phytonutrients which boost the immune system and strengthen the heart. One cup of ’em also provides double your daily dose of Vitamin K, which helps with blood clotting and bone strengthening.

So…what do you do with 100 green onions?

Eat them raw: top salad, soup, or any dish where some fresh, light onion flavor is desired (pasta, beans, curry, stir fry, baked potatoes, etc. etc. etc.)

Freeze them whole or chopped: seriously, simple as that – they freeze really well in tupperware or a plastic bag

Caramelize them: I sliced the bottoms of about 20 (and another batch of 40) and sauteed them in a bit of olive oil on a very low heat for almost an hour. The onions get browned, sweet and can be eaten on grains, pizza, with vegetables or by themselves. These also freeze well.

Make quick pickles: For a pint jar, slice up your scallions (or other vegetable) and add them to the jar. Bring 3/4 cup vinegar, 1/4 cup water, 1 tsp. salt, a pinch of peppercorns, one dried hot pepper, and a hint of honey to boil. Pour it over your scallions. Let cool to room temperature, then put a lid on it and pop it in the fridge. Eat within the month (or do some water bath canning to preserve much longer).

Ferment them: I’ll have to do a longer post about fermented foods to convey both their delicious taste and major health benefits, but for now, just know that this is a 3-ingredient, essentially no work involved situation. Chop up the top parts of scallions, massage with salt and hot pepper, place into a jar or crockpot and let sit until juices form, then using a smaller jar filled with water, keep the scallions submerged under their own liquid. Let sit on your counter, covered, for another week or so until it tastes and smells pungent and spicy, but not unpleasantly sour. Eat probiotics for better health: improve digestion, enhance immune function, normalize skin health, maintain strong bones and keep blood sugar levels regular!

Make “pesto”: Blend a bunch of scallions with some garlic, sesame seeds, salt and lemon juice. Use in grain or legume dishes, on bread, as a dip for veggies or freeze for future use.

Here are some other ways to reduce food waste. Whatever you do, don’t put it in your trash. There are many statistically significant studies that food releases methane when it breaks down, contributing to a host of environmental problems. Check to see if your city does curbside composting, ask your neighbors or local farms if they’d take it from you, or save your veggie scraps to make broth (I keep a ziploc bag in the freezer and add ends of onions, tops of carrots, bottoms of asparagus, peelings of potatoes, etc – when the bag is full, I dump it in water, add some salt and simmer until it’s veggie broth deliciousness).

Now if I could just find the time to preserve all the extra vegetables we have each week after our CSA distribution….